Today I'm going to show you how I made myself a personalized clipboard for my classroom.
I LOVE having pretty things in my classroom, but I DON'T want to pay the big bucks for them. :)
So... I started with some clip art that I bought from Pixel Paper Prints on Etsy.
I LOVE her! I bought three sets and got one free. But... she sent me two free and a discount code for my next purchase! AWESOME!
I opened Power Point and picked the papers that I wanted for my clipboard. I put the paper image that I wanteed for the top of the clipboard on one slide and printed.
Then I put another paper graohic that I wanted for the bottom of my clipboard and positioned it at the bottom of the slide, leaving about half of my top paper exposed to be seen.
{I am SO sorry that I don't have pictures of this!}
I chose a third paper image and positioned it in between the two and sent it to the back. The top paper got sent to the back next and I had three different papers exposed.
I had a tree image and put it on the edge of my slide and put an owl in the tree.
I added a text box to the lower right corner and chose my font {Digs my Hart from Kevin and Amanda. LOVE!} and color.
If you are confused by these directions, please let me know and i'll try to explain more.
I printed that slide and was done with the computer.
Using my paper cutter, I cut the white edges from paper.
Now to the fun part!
I bought a 97 cent clipboard from Wal-Mart and some Mod Podge.
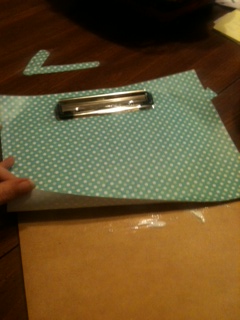
I fit the solid paper print {my first slide} around the clip part. This was probably the hardest part of the process. I took a lot of fitting and cutting to get it just so. The clip isn't flat against the board on the edges, so I slid my paper under it in some places.
Leaving it on the board, I lifted the paper up and brushed Mod Podge under the paper. Don't put too much. You shouldn't see any white globs. I worked from one side to the other in small parts and pressed the paper down and smoothed it out as I went.
Then I lined the second slide I printed up with the paper on the board
and Mod Podged it down.
I left an edge on my papers so I could fold it over.

I Mod Podged it down and left the corners alone.

I snipped the overflow just a little so I could fold it

over and Mod Podge it down.
Let this dry and use as much as you need.

Mod Podge the top of your clipboard so it will stay nice and pretty. I used two coats and dried them in between.
Here is the finished product.

If you have any questions, please ask. I'll try to explain more. :)
I plan on tying strips of ribbon to the clip part of the board.
Heather
So cute! I used duct tape to make mine. Way better than plain brown clipboards!
ReplyDeleteSara :)
Smiling In Second Grade
Thanks! I hadn't thought about duct tape! The plain brown is boring, but holds up better than the plastic ones. :)
Delete